Design Sizing and Placement Guide
Sizing And Placement
We get a lot of questions about design sizing and placement here at Printaura. People aren't sure how to gauge the sizing of their designs. It can be hard to visualize the size a digital design on a real life garment. We decided to create this handy guide to help you figure out how to size and place your designs.
Maximum T-shirt Print Size
The first thing you need to consider when sizing your design for a t-shirt is the actual printing size that is available on our t-shirts.
Regular: 12 inches x 16 inches Oversized: 14 inches x 18 inches
Anything sized larger than this will be kicked back to you. We cannot print images that are bigger than the printable space of a t-shirt!
Some Things To Consider
The Size/Type of Shirt
What kind of shirt are you planning to sell this design on? Is it a basic t-shirt, a tank top, a long sleeved shirt? Larger designs can look overwhelming on tank tops or smaller sized shirts. Smaller designs can get lost on standard t-shirts and larger sizes. If you are planning to sell the design on multiple types of shirts, you may want to consider re-sizing your image to fit the different styles.
Shape Of Design
This one is a biggie! Let's say you are working in a Photoshop workspace that is sized at 12" x 16" but you place your design in the center with lots of space around it. Keep in mind, if you only use up part of the space, your actual design size will be much smaller than the workspace you are designing in. Try cropping your design down to the edges and seeing what size it ends up being. That is the size your image will be printed at. Also, consider the shape of your design. Is it horizontal, vertical, square, or circle? The shape of your design may influence what size you want it printed at. DPI
Make sure your DPI is set to 300! We have a video tutorial if you aren't sure how to check or change it. Having a DPI lower than 300 can seriously alter the quality of your print, especially if you want a larger sized print. Desired Size/Placement
Think about what size you want your design to be on a shirt. You don't need to fill the entire print area. Sometimes bigger isn't always better! Grab a t-shirt and throw it on. Think about where you would want your design to rest, and about how large you would like it.
Quick Trick
A really quick and easy way to help you visualize how your design will look printed on a shirt is to round up some common household items.
You will need:
- 8.5" x 11" piece of standard paper
- T-shirt
It's best to use the type of shirt you are planning to offer the design on. So if you are offering it in a tank top and a t-shirt, grab one of each!
Note: Since we print out your designs on our products in the exact size you send them to us in, this can be very helpful in deciding what size to make your design. Our standard print area for t-shirts is 12" x 16". If you think about it, that's quite a bit larger than a piece of standard paper!
Just lay our shirt down on the floor and place the print paper on top of it like below. The size of the paper represents the size your image will be printed onto the shirt.
For your reference, the shirt used here is a size medium American Apparel Ladies Tri-blend T-shirt.
8.5" x 11"
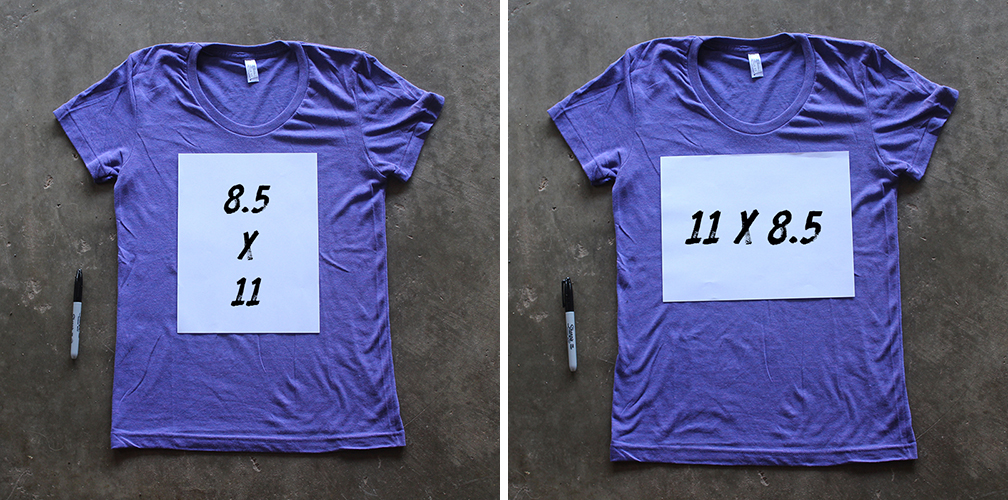
The size of most standard printer paper is 8.5" x 11".. Take a look at how much space it takes up on this shirt! If this seems too large, fold the paper in half.
5.5" x 8.5"
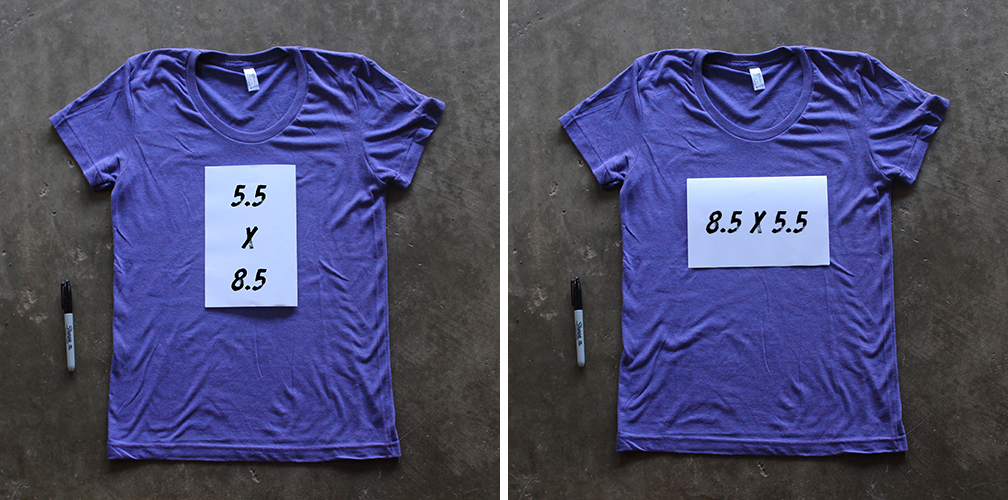
The size of the paper is now 8.5" x 5.5". If this still seems too large for the design you have in mind, fold it once again!
4.25" x 5.5"
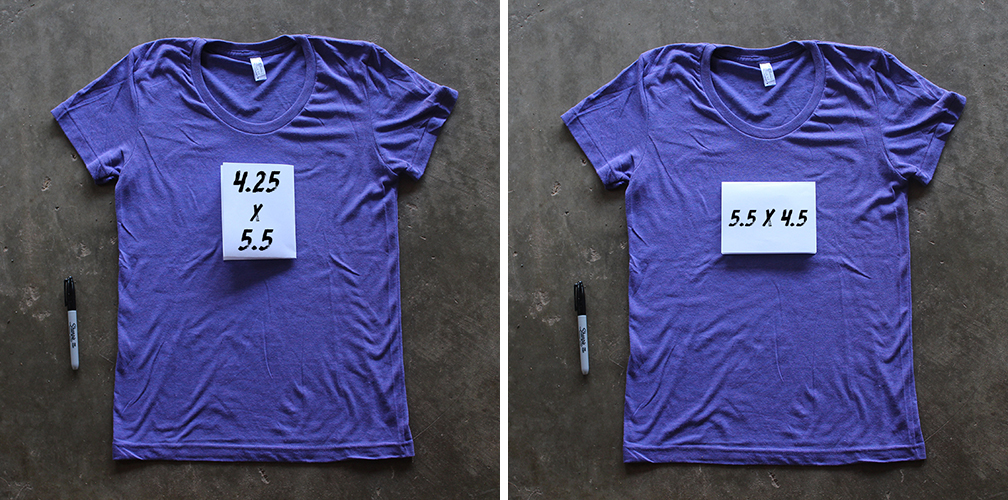
The paper is now 4.25" x 5.5". You can play around with the direction of the paper and the size of the paper until you are happy with the size. Once you are happy with the sizing of your paper, take note of it's size and adjust your design to fit that size.
Watch The Video
We created ta little video to help our users understand sizing and placement a bit better.